This post covers the necessary steps to create a wordpress site. Because the idea behind this post is to give an idea of OCI VMs, we’ll use two compute instances, one of them will be the web server and the other the database server.
Throw this post we’ll see the following components:
- Compute instances with Oracle Linux.
- Internet Gateways.
- Route Tables.
- Security List.
- Network Security Groups.
- NAT Gateways.
- Apache.
- MariaDB
- Firewalld service on Oracle Linux.
- SELinux.
Before proceed, you need a VCN, if you haven’t, keep an eye on this post.
– Compute shape.
Depends on you workloads Oracle offers a range of VM shapes divided into more specific characteristics. In this post we’ll use the flexible shape (it’s in fact a VM standard shape that scale resources based on ocpu the number) VM.Standard.E3.flex which is a GN2 AMD EPYC. I’ll choose 1 OCPU (1 OCPU = 1 physical core = 2 vCPUs) with 16GB Memory.
Creating the webserver1 instance.
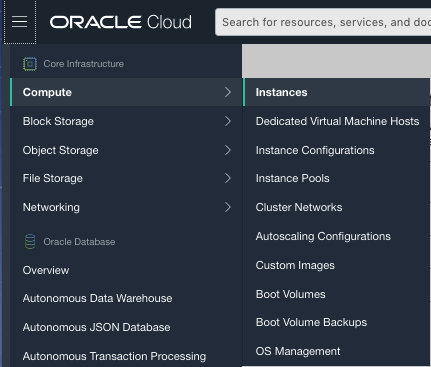
Click on the hamburger button –> Compute –> Instances
Click “Create Instance” button.
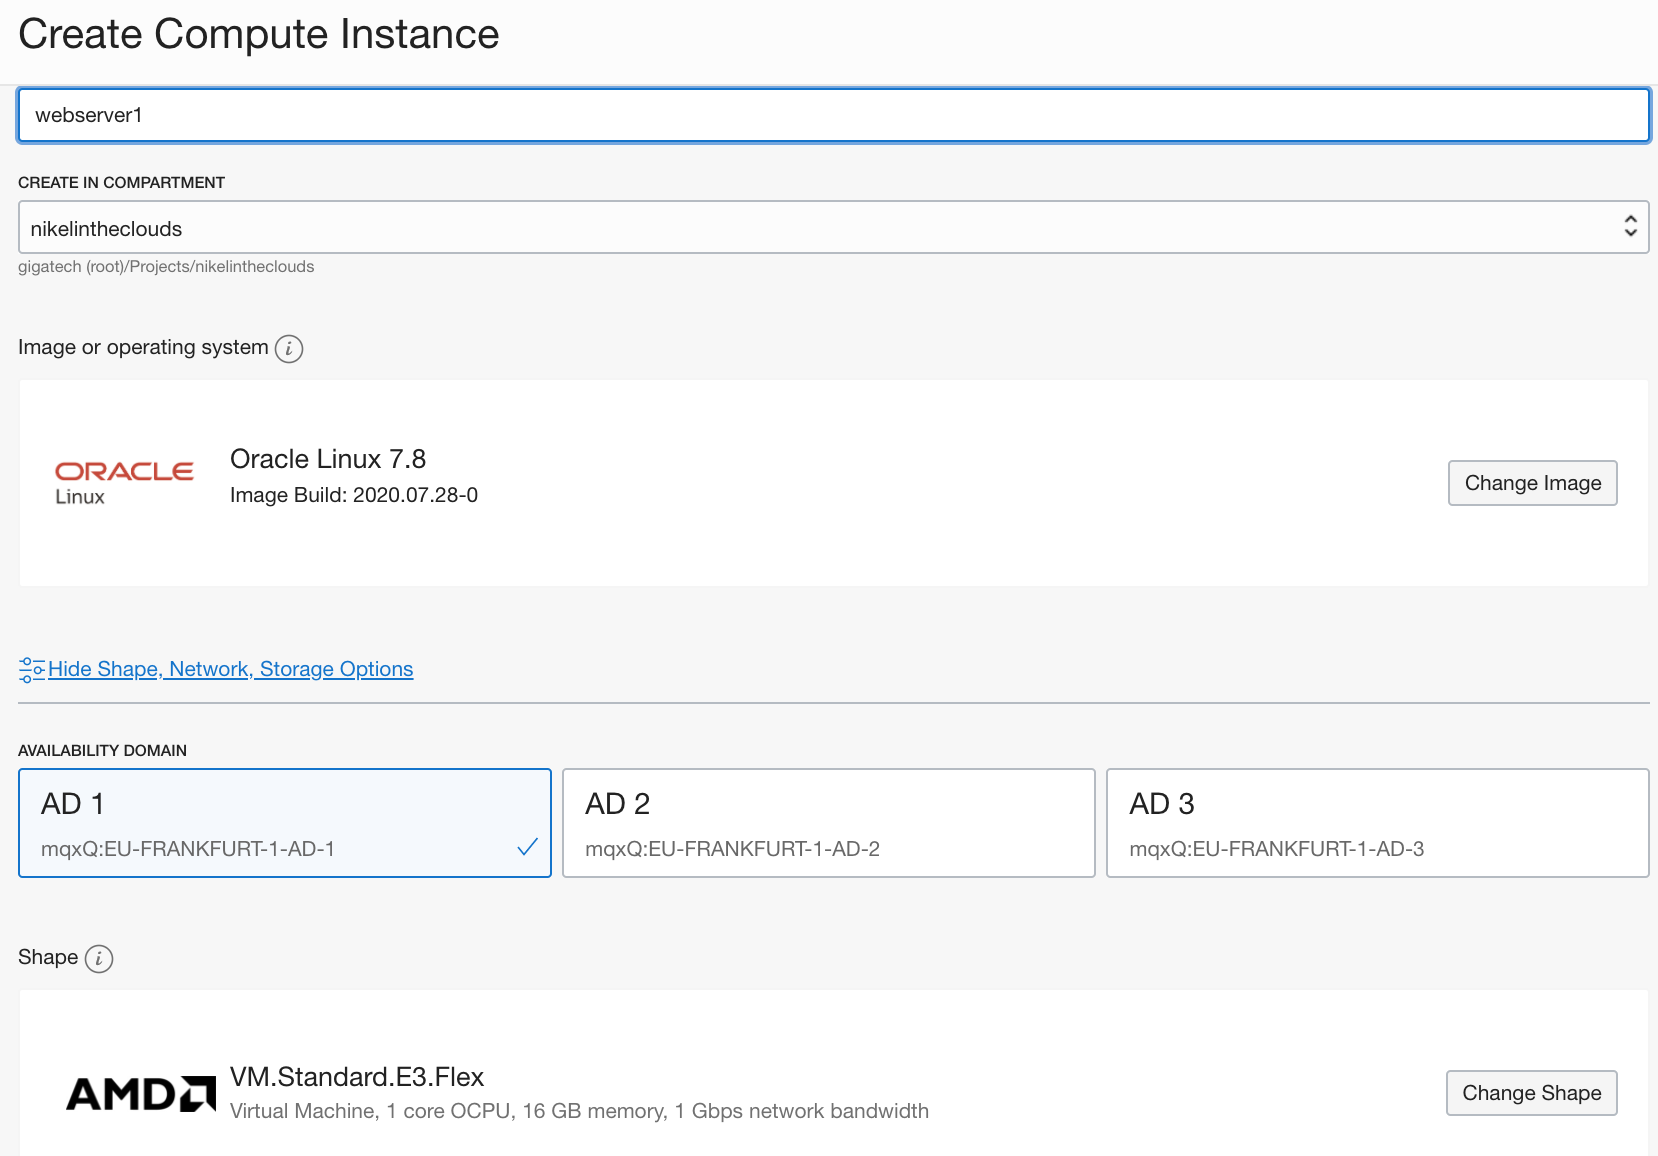
Select the compartment and write a name, in my case
NAME: webserver1
CREATE IN COMPARTMENT: nikelintheclouds
Choose an AD, in my case EU-FRANKFURT-1-AD-1 which belong to the EU-FRANKFURT-1 region.
This time we are going to choose the Oracle Linux 7.8, which is a RH compatible image. Click “Change Image” button, and in the “Platform Images”area, click Oracle Autonomous Linux and click “Select Image” button.
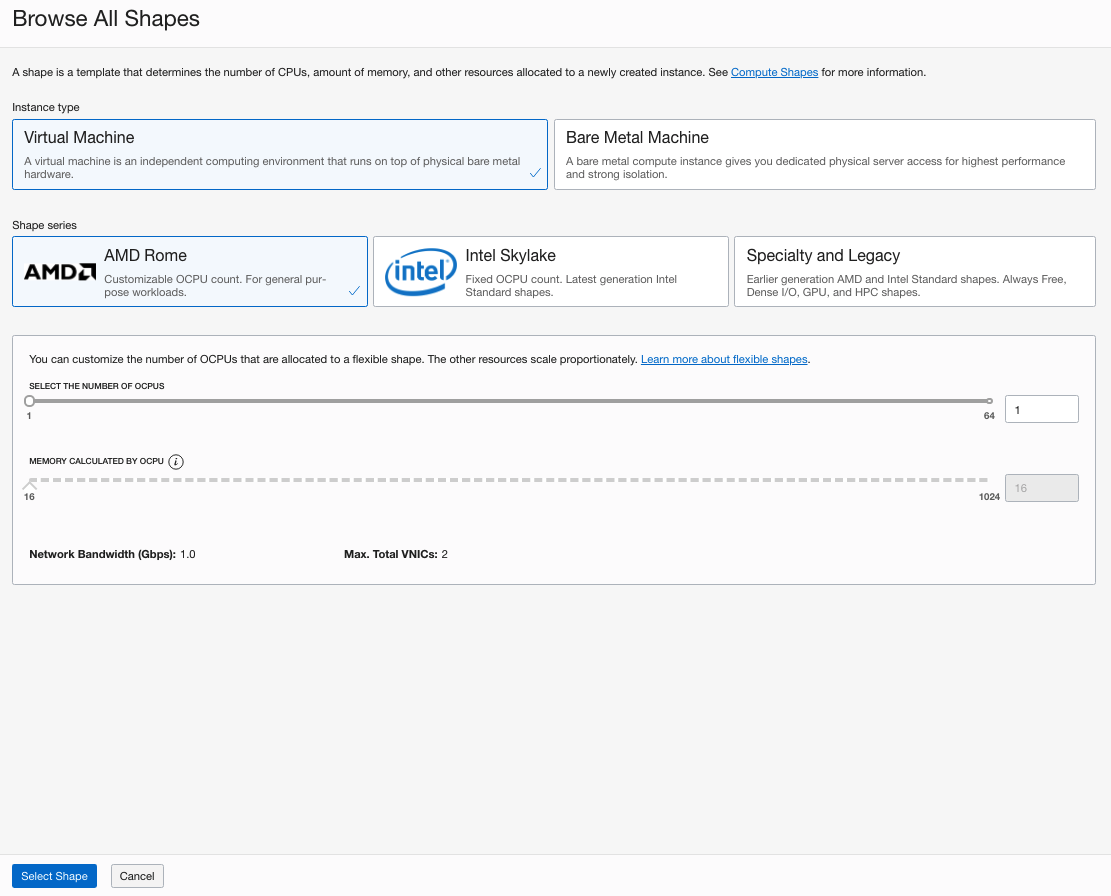
As i said, we’ll choose the VM.Standard.E3.Flex. Click” Change Shape”. In the instance type, select “Virtual Machine” and Shape series AMD Rome, Click “Select Shape”:
At this point this is our picture:
If you came from this post where we created the network, then you’ll have the next config:
- One VCN with cidr 10.20.0.0/16
- One private subnet 10.20.1.0/24
- One public subnet 10.20.2.0/24
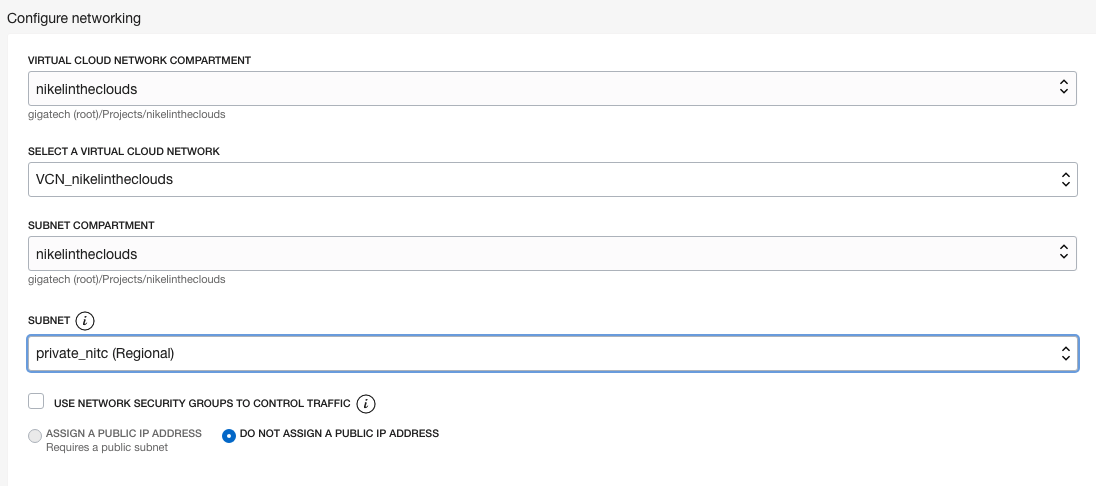
So, in the network area choose the compartment where the VNC resides, then your VCN and the subnet. First we are going to create a compute instance in the public subnet.
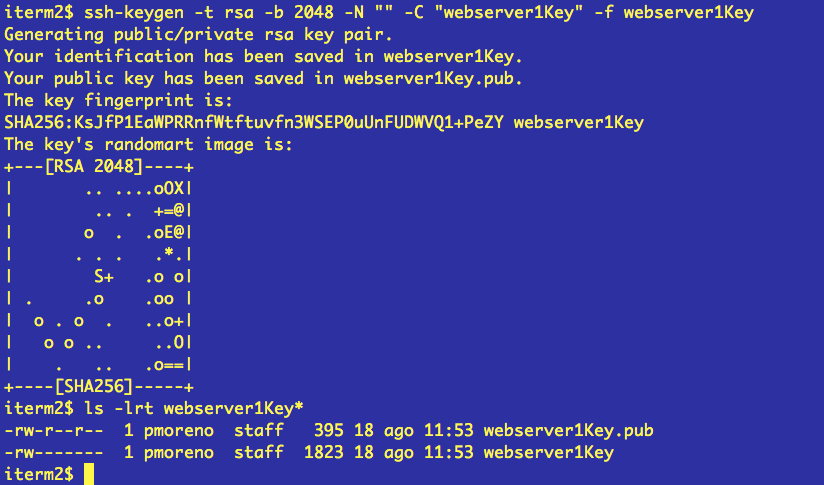
In order to connect to the VCN we need to generate a ssh key pair and upload the public key. If you are using linux based system then you can run the ssh-keygen command as follow
ssh-keygen -t rsa -b 2048 -N “” -C “webserver1Key” -f webserver1Key
Then in the Add SSh keys you can select “PASTE SSH KEYS” and paste de public key in the text area:

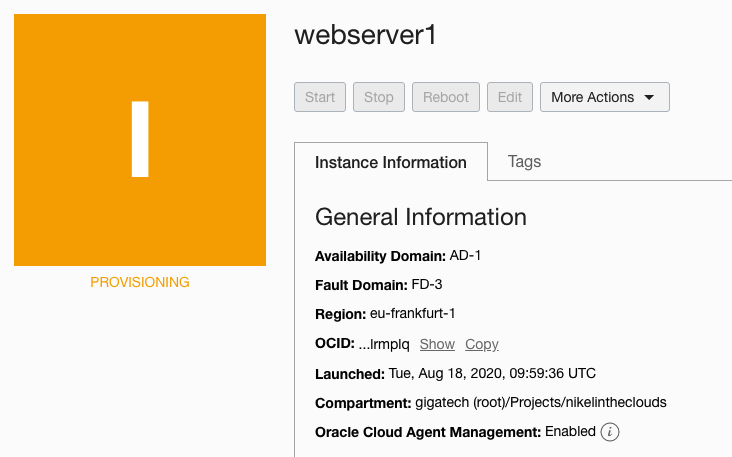
Click Create.
You’ll see that the compute instance is in PROVISIONING state.
After a while, your instance will be up and running, in this page you’ll see the public and the private ip.
but before we can connect to the instance we have to config some components.
Internet Gateway
IG is a virtual router that allows instances which resides in a public subnet to be reached from internet and reach internet.
Route Tables
Probably you know about route tables, it define routes to reach specific CIDR.
Firewall rules
You can manage the FW rules using Security List (SL) and Network Security Groups (NSG).
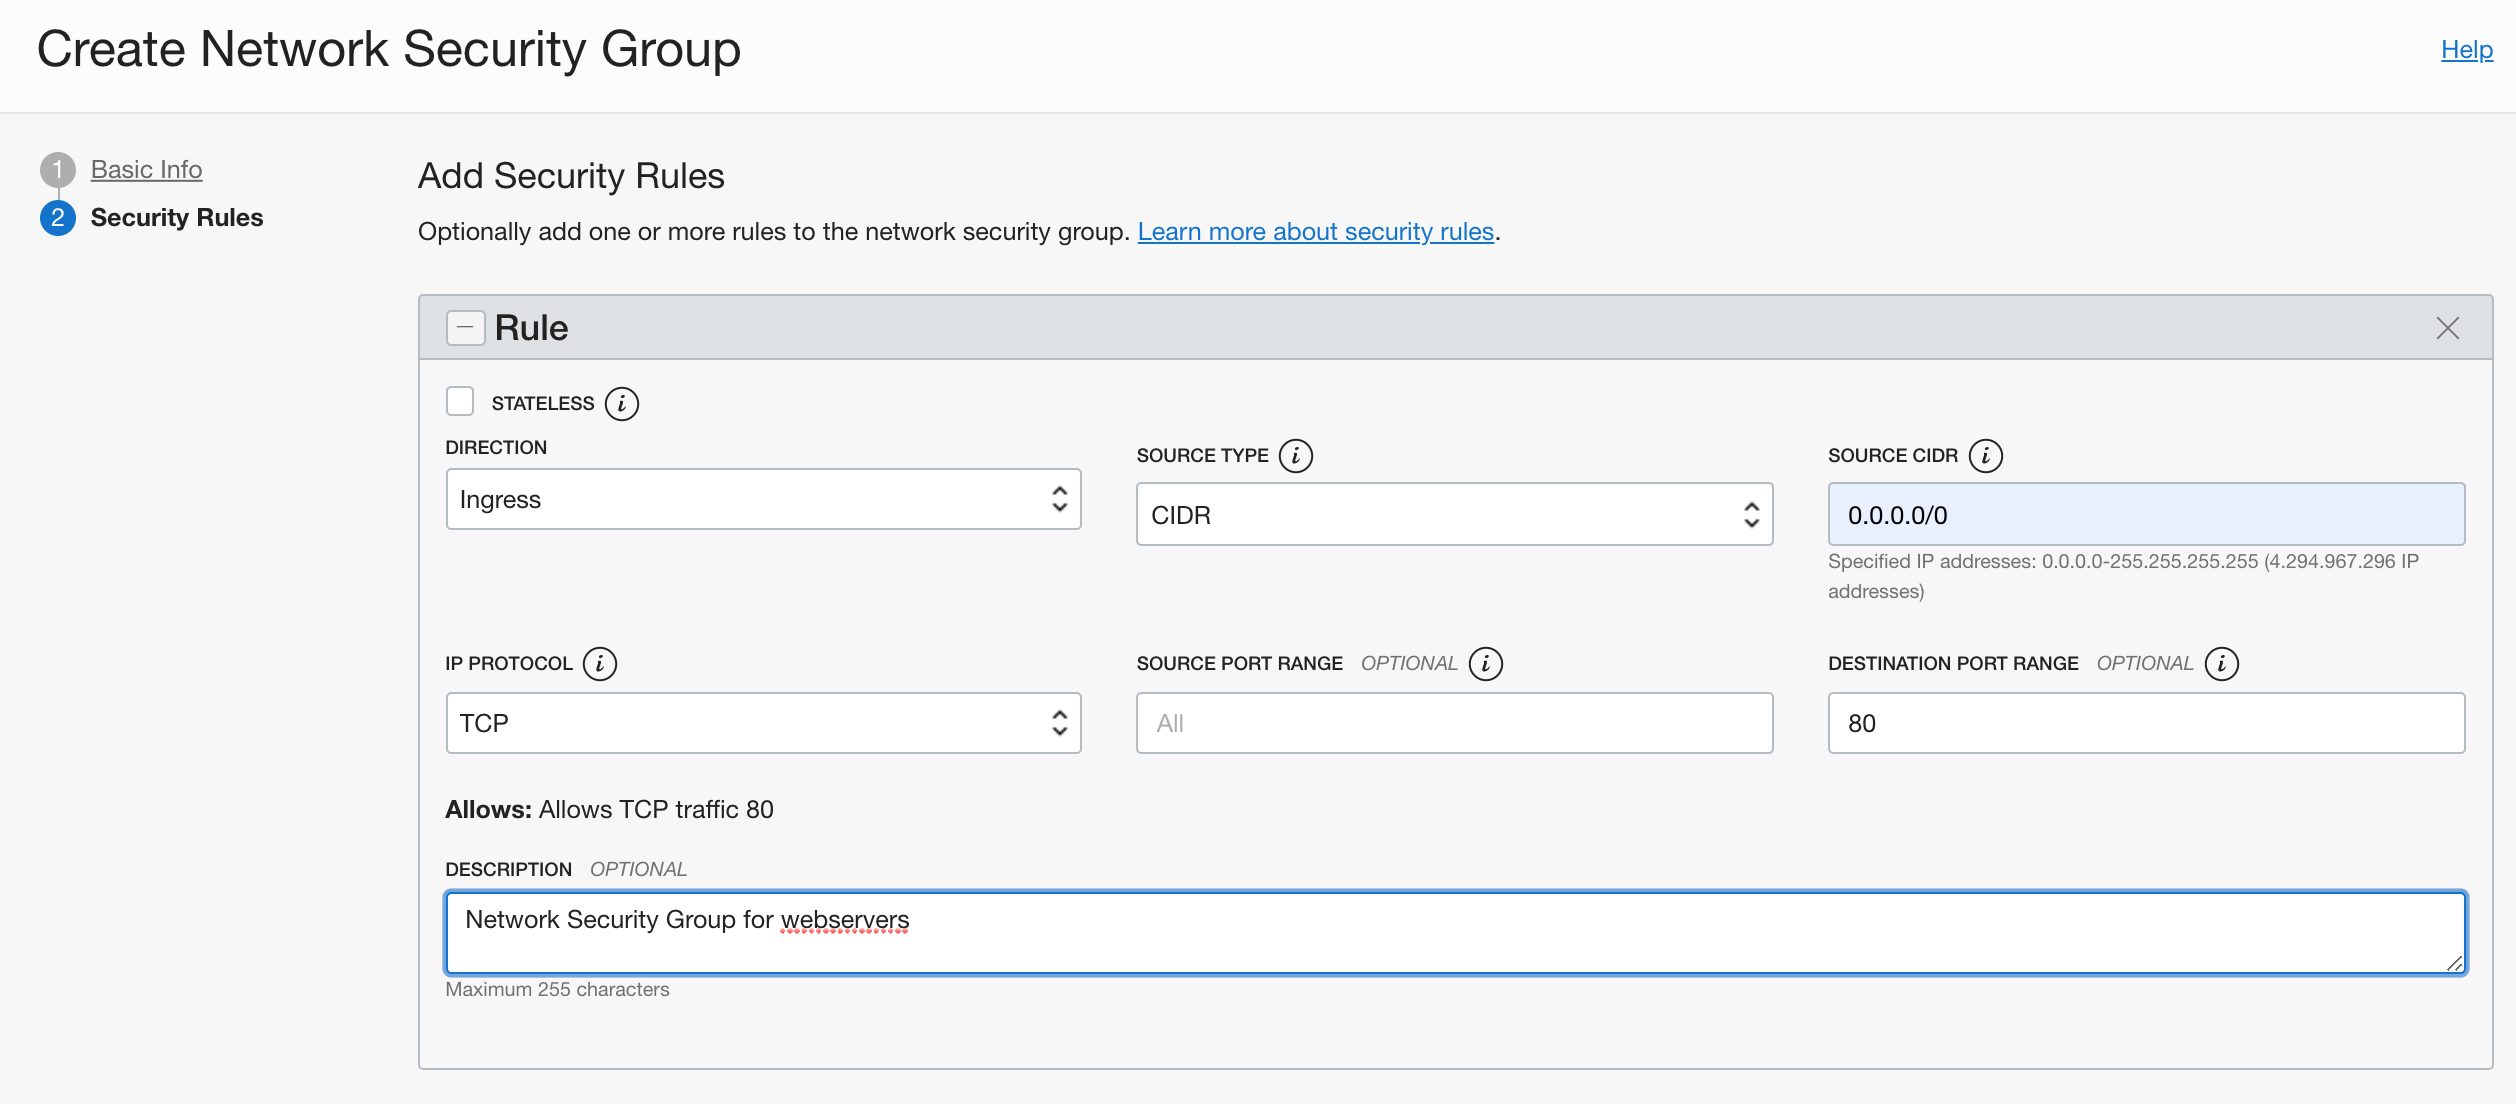
SL are rules applied to all components that belong to the VCN. In the other side you can “attach” a NSG to specific instances or group of instances, pe i’d open the port 80 to the webservers, not all instances including database servers.
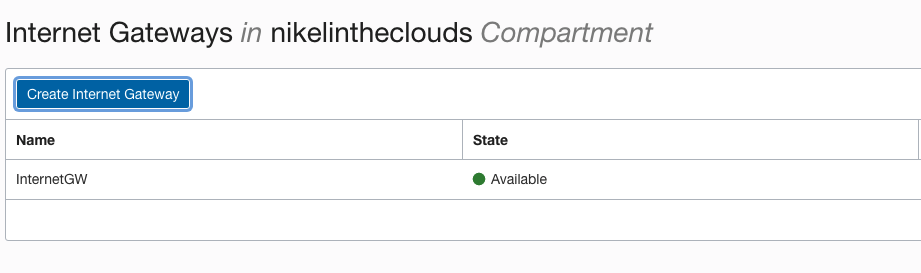
First at all, lets create the IG. Click Hamburger button –> Networking –> Virtual Cloud Networks, then click the VCN you want attach the IG. In the left panel click “Internet Gateways (0)”
Choose a name and the compartment and click “Create Internet Gateway” button:
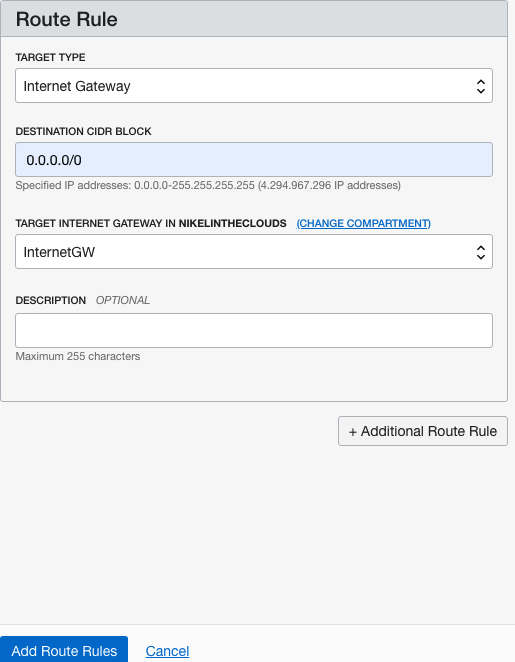
In the left panel click “Route Tables (1)” and lets add a route in the default route table. Click “Default Route Table for VCN [YOUR_VCN_NAME], then “Add Route Rules” button.
In Target type, choose “Internet Gateway”, the destination cidr block is internet 0.0.0.0/0, the choose the internet gateway, click “Add Route Rules” button:
At this time, you must be able to connect to the compute instance using the public IP because the default security list includes an ingress rule from internet to port 22, check it out.
In your VCN (Click Hamburger button –> Networking –> Virtual Cloud Networks, then click your VCN)
In the left panel click Security List, then click “Default Security List for VCN [YOUR_VCN]” There is a rule with Source 0.0.0.0/0 TCP protocol, All source port range and destination port 22.
ssh -i webserver1Key opc@[YOUR_PUBLIC_IP]
Not let’s create other compute instance but this time in the private sebnet. The idea is the instance in the public instance the webserver, could be reached from internet throw the public ip, but this is not the case for the other instance, the database server, which will be reached by its private ip in this case by the webserver. This is a typical architecture client–>server–>database.
In my example I’ll create the dbserver1 with the same attributes as the webserver1 but this time in the private subnet.
- Install apache2 in the webserver1:
sudo yum install -y httpd24.x86_64
sudo yum install -y rh-php72-php.x86_64
sudo yum install -y rh-php72-php-mysqlnd.x86_64
sudo systemctl start httpd24-httpd
- Open port 80:
Go to the VPN, in the left panel, click “Network Security Groups”.

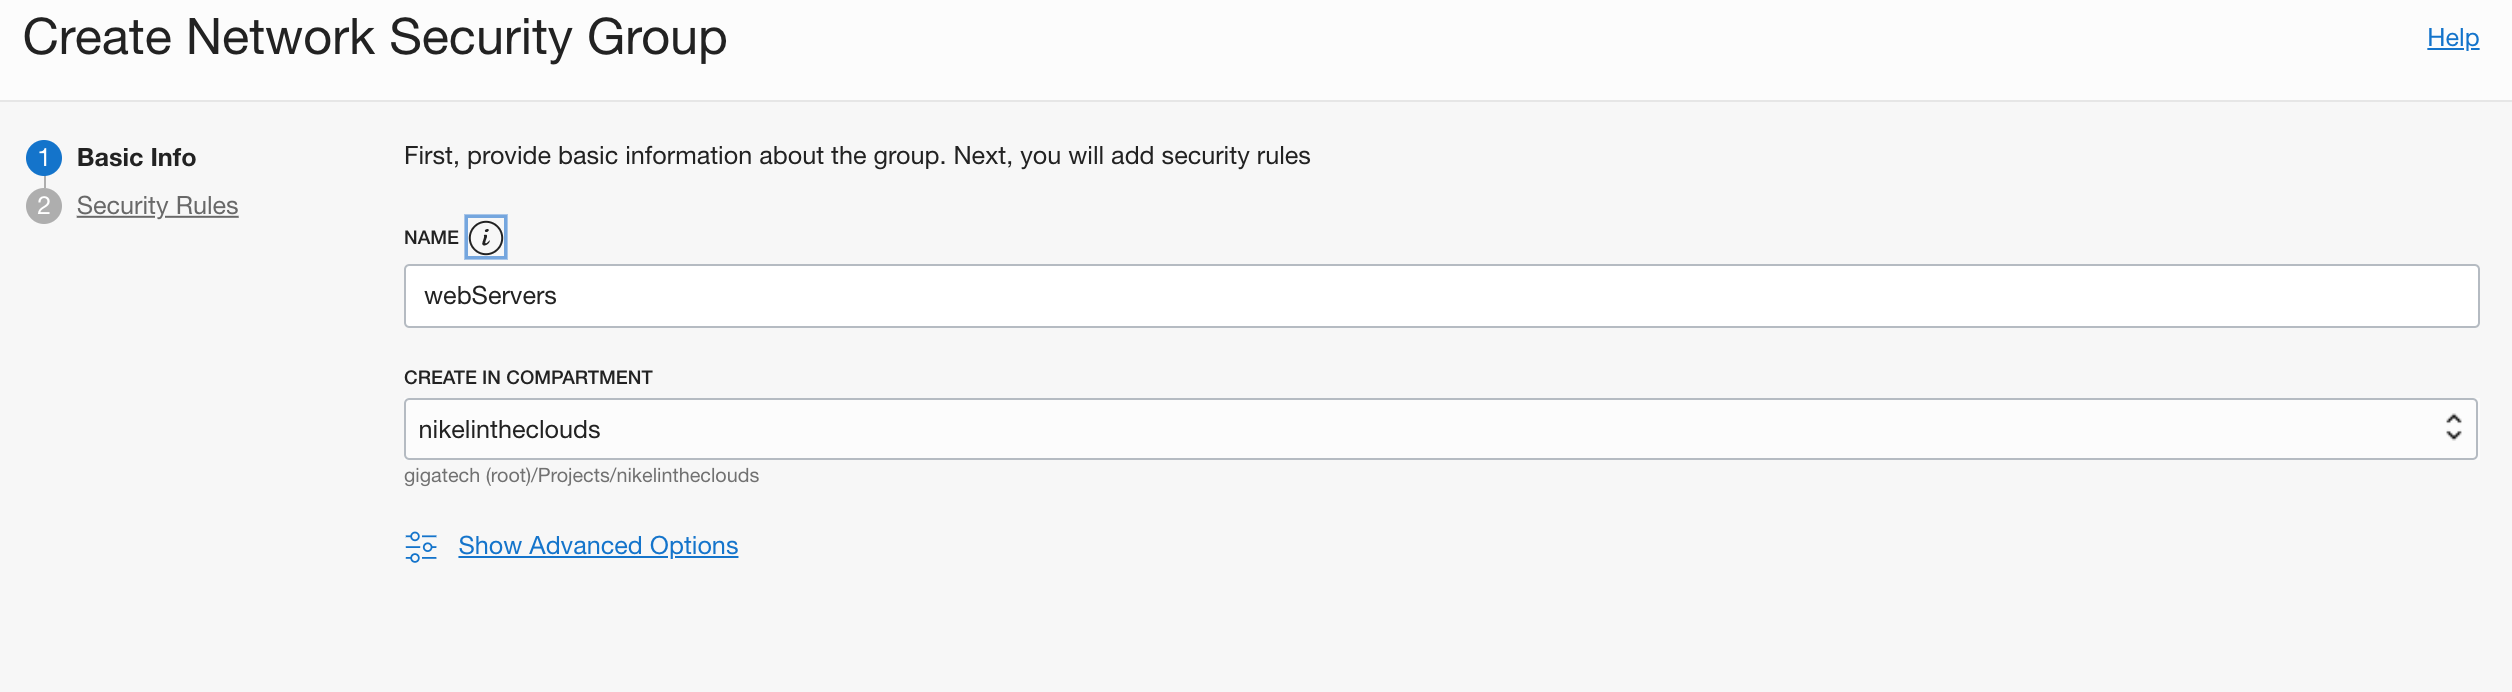
Click “Create Network Security Group” button
The next step is to attach the NSG to the compute instance. Go to webserver1 compute instance and in the Primary VNIC area, click the Edit link in the Network Security Groups:

Choose the NSG previously created.
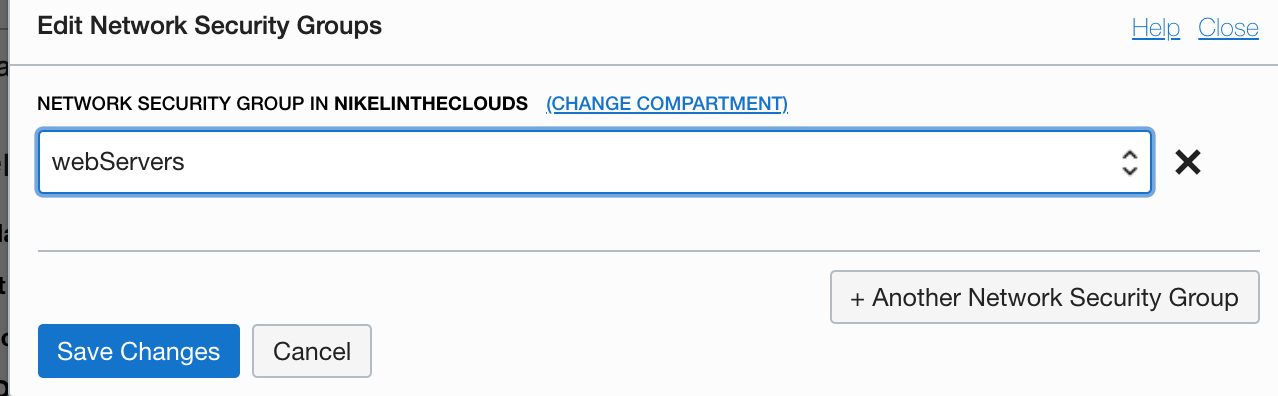
Click Save Changes.
The last step before install wordpress is configure the firewalld and selinux in the compute instance. Connect to the instance and open the port 80 at service level:
sudo firewall-cmd --zone=public --add-port=80/tcp --permanent
sudo sudo firewall-cmd --reload
sudo setsebool httpd_can_network_connect_db 1
Install wordpress (with opc user):
wget http://wordpress.org/latest.tar.gz
tar xvfz latest.tar.gz
sudo mv wordpress/ /opt/rh//var/www/html/
sudo chown -R apache:apache /opt/rh/httpd24/root/var/www/html/wordpress/
cd /opt/rh/httpd24/root/var/www/html/wordpress/
sudo semanage fcontext -a -t httpd_sys_content_t "wordpress(/.*)?"<br>restorecon -R -v wordpress/
Configure virtual host:
sudo vi /opt/rh/httpd24/root/etc/httpd/conf/httpd.confadd the following lines at the end of the file:
<VirtualHost *:80>
    ServerAdmin webmaster@tecadmin.net
    DocumentRoot /var/www/html/wordpress
    ServerName myblog.nikelintheclouds.com
    <Directory "/var/www/html/wordpress">
         Allowoverride All
     </Directory>
    ErrorLog logs/svr1.tecadmin.net-error_log
    CustomLog logs/svr1.tecadmin.net-access_log combined
</VirtualHost>
In your client machine and in webserver1 add myblog.nikelintheclouds.com
vi /etc/hosts<br>[WEBSERVER1_PUBLIC_IP] myblog.nikelintheclouds.comSet correct values in wp-config.php
cp /opt/rh/httpd24/root/var/www/html/wordpress/wp-config-sample.php /opt/rh/httpd24/root/var/www/html/wordpress/wp-config.phpEdit wp-config.php and config the following variables:
define( 'DB_NAME', 'wordpress' );
define( 'DB_USER', 'wp' );
define( 'DB_PASSWORD', 'secretPass' );
define( 'DB_HOST', 'dbserver1.priv.nikel.oraclevcn.com' );
Restart apache:
sudo systemctl restart httpd24-httpdDBSERVER1 Prerequisites
In order to install mariadb in dbserver1 you have to connect and, it will be easier if dbserver1 which is in a private network with no public internet address, would reach internet. To provide internet connection another component must be added, NAT gateway.
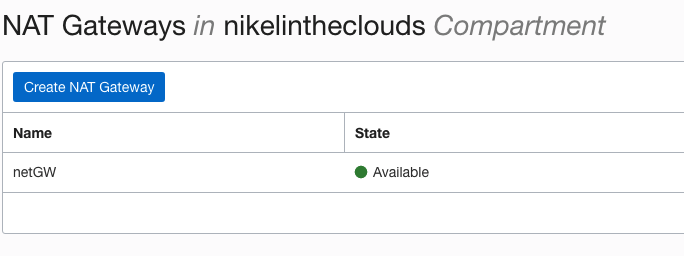
Go to you VCN and in the left panel, click Nat Gateways and click “Create NAT Gateway” button. Give it a name and choose the compartment.
The next step is create a Route Table.
Go to the VCN page and in the left panel click “Route Tables” give it a name and choose a compartment, click “Create Route Table” button.
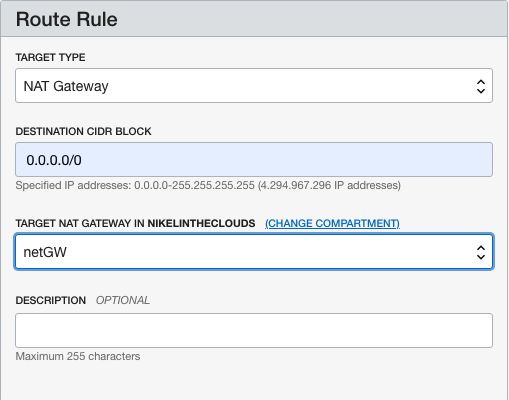
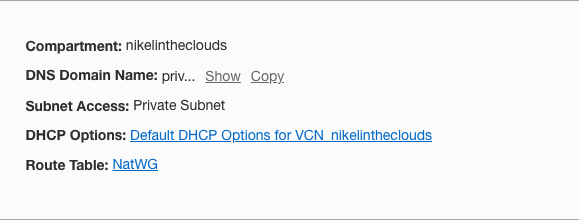
Each subnet only can has one route table assigned to it, so, we have to change the route table of our private subnet. In the left panel click Subnets, click your private subnet where dbserver1 resides and click Edit button then in the Route Table area select the NAT gateway just created. Now dbserver1 must reach internet. Check it out (ping google.com).
MariaDB installation on dbserver1:
sudo yum install -y mariadb-server.x86_64<br>sudo systemctl start mariadbAt this time you can connect to mariadb without password:
mysql -u root -p
(and click enter)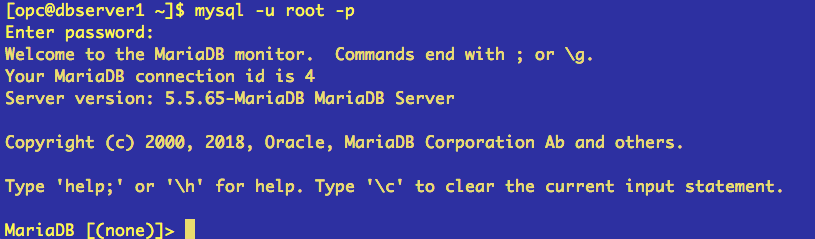
An important step is, secure our database server:
[opc@dbserver1 ~]$ sudo mysql_secure_installation
Enter current password for root (enter for none):
Set root password? [Y/n] Y
Remove anonymous users? [Y/n] Y
Disallow root login remotely? [Y/n] Y
Remove test database and access to it? [Y/n] Y
Reload privilege tables now? [Y/n] Y
Create the wordpress database:
[opc@dbserver1 ~]$ mysql -u root -p
MariaDB [(none)]> CREATE DATABASE wordpress;
Query OK, 1 row affected (0.01 sec)
MariaDB [(none)]> GRANT ALL PRIVILEGES on wordpress.* to 'wp'@'webserver1.public.nikel.oraclevcn.com' identified by 'secretPass';
Query OK, 0 rows affected (0.00 sec)
MariaDB [(none)]> FLUSH PRIVILEGES;
Query OK, 0 rows affected (0.00 sec)
Configure firewalld to open 3306, the default mysql port
sudo firewall-cmd --zone=public --add-port=3306/tcp --permanent
sudo firewall-cmd --reload
Open a web browser and go to http://myblog.nikelintheclouds.com/wp-admin/
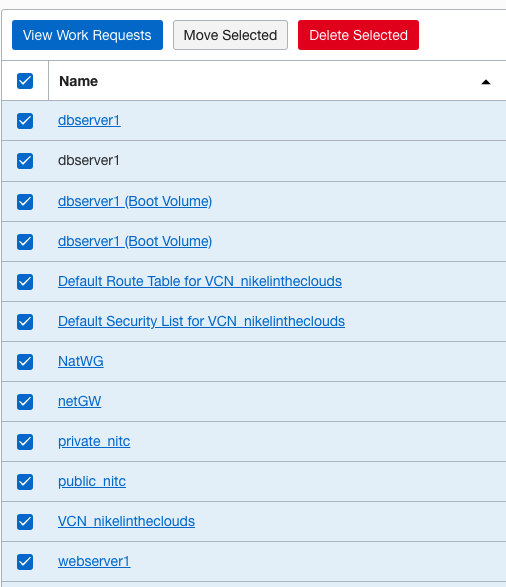
If you want delete all resource previously created, just click in the hamburger button –> Governance –> Compartment Explorer, select all resources and click “Delete Selected” button.