Avoiding manually provisioning of the infrastructure these days is a must. You’ll avoid accidental misconfiguration, your infrastructure will be well documented and with the help of a version control software such as git you can control multiple versions of your infrastructure.
Terraform is a software that allows you to build an infrastructure using Infrastructure as Code (IaC). Its part of other automations tools, such as Ansible, Packer, Puppet, etc.
In this post well configure the same infrastructure as we did manually in this post, but this time using Terraform.
Installing Terraform
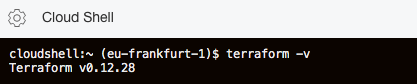
You can install terraform in mac, linux and windows. However, you can launch the cloud shell

that includes a Terraform installation.
So, if your code are in a git repo, you can clone the repo and work with terraform using the OCI Cloud Shell.
But if you want install Terraform in your computer, then go to https://www.terraform.io/downloads.html, choose your OS and download it. For example in Linux OS:
wget https://releases.hashicorp.com/terraform/0.13.0/terraform_0.13.0_linux_amd64.zip
unzip terraform_0.13.0_linux_amd64.zip
mv terraform /usr/local/bin/
terraform -v
Terraform v0.13.0
Concepts
You’ll write the code in HCL, a declarative language. In a declarative language you don’t write actions or commands, you write states. This is the opposite of procedural language.
Terraform must authenticate in OCI, we’ll use the CLI config file.
Provider. Its the plugin that connects terraform with the cloud you want manage, OCI, AWS, GCP, Azure etc, and not only you can manage clouds, you can manage you own infrastructure with the KVM provider.
Most of the time you’ll use three commands:
init: Initializes the working directory and download the plugin of the provider.
plan: it creates an execution plan of the changes before applying them.
apply: when you are agree with the output’s plan, then apply the changes of the infrastructure. It can be new resources and/or modify resources and/or delete resources (any of them).
Terraform variables. Along the following steps we’ll use variable. In terraform this is how we define a variable:
variable "myVar" {}Even we can define the type and a default value:
variable "myVar" {
type=string
default = "anyvalue"
}
Lets create a directory where write our code
mkdir nkelinthecloud
cd nkelinthecloud
Then execute terraform init
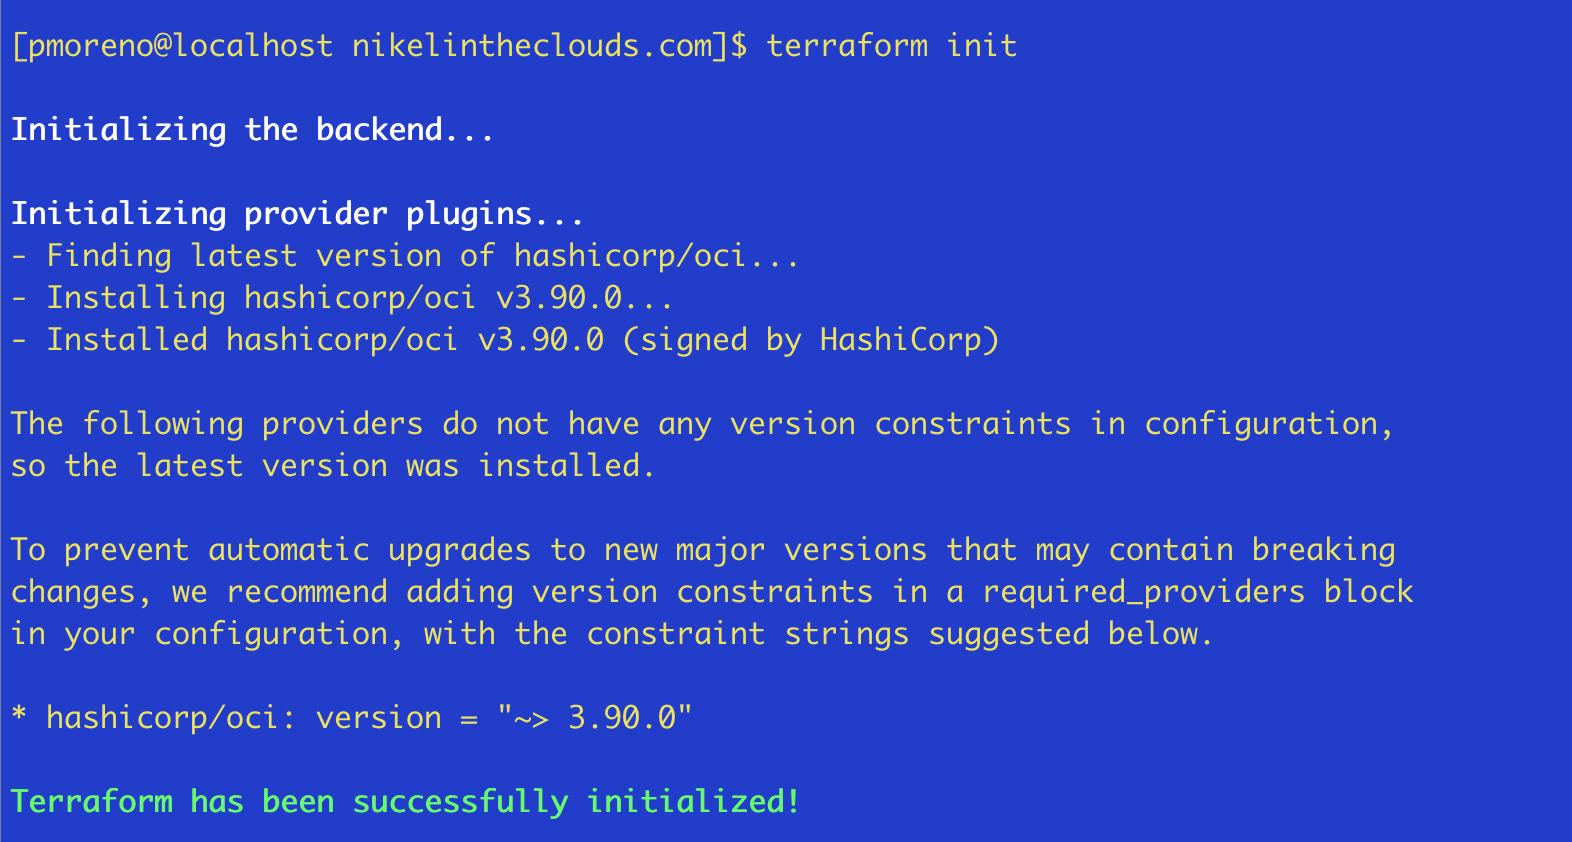
The first terraform file we are going to create is providers.tf (terraform uses .tf files). You can use any filename but as we are going to define out providers, providers.tf is a good name.
providers.tf:
provider "oci" {
  tenancy_ocid     = var.tenancy_ocid
  config_file_profile= var.config_file_profile
}
As you see there are var references, theses references could be defined in the same file, so lets define theses variables
variable "tenancy_ocid" {}
variable "config_file_profile" {}

  provider "oci" {
  tenancy_ocid     = var.tenancy_ocid
  config_file_profile= var.config_file_profile
}
Theses variables need data in order to connect to OCI. I’ll give values to the variables in a file that terraform will use by default, terraform.tfvars
tenancy_ocid = "ocid1.tenancy.oc1..aaaaaddd"
config_file_profile = "DEFAULT"
But this do nothing, we need other tf, that creates some resources. The first resource tat we’ll crate is a compartent, lets create compartment.tf:
resource "oci_identity_compartment" "nikelinthecloud" {
  name           = "nikelinthecloud"
  description    = "compartment created by terraform"
  compartment_id = var.tenancy_ocid
  enable_delete  = true
}
– resource Point that we want to create a resource
– oci_identity_compartment Is the resource type, in this case a compartment.
– nikelinthecloud Is a name that we can use to reference this resource
– name Is the name of the resource.
– enable_delete Allow as to delete the compartment if we run terraform destroy
I recommended you that keep an eye to the terraform OCI docs. There you can review all resources and theirs arguments.
Lets run terraform plan, if you don’t have any error, you must see something like this:
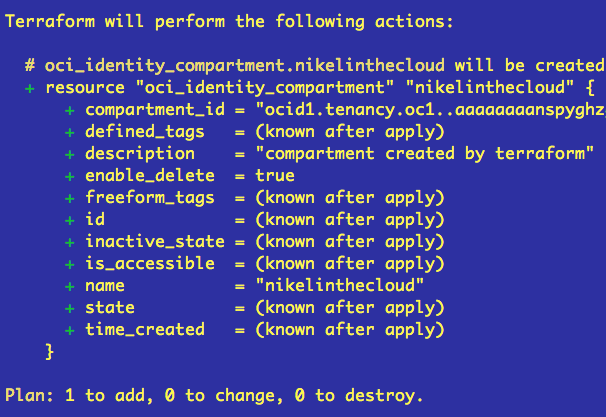
Terraform tells you which resources he is managing and what he will do with them. In this case + (add) resource oci_identity_compartment
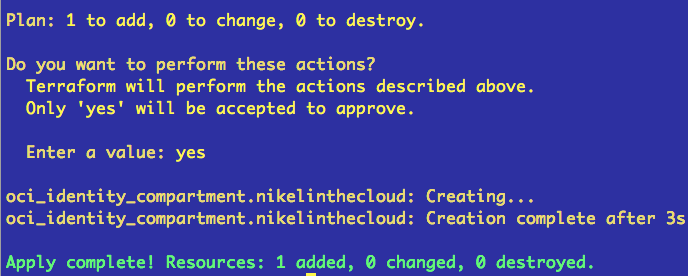
In this last line you’ll see a summary: Plan: 1 to add, 0 to change, 0 to destroy.If you agree with the plan, then lets apply it, run terraform apply
We have a compartment where create our infrastructure, let’s create the VCN, edit vcn.tf
resource "oci_core_vcn" "vcnnitk" {
  cidr_block     = "10.20.0.0/16"
  dns_label      = "nikelinthecloud"
  compartment_id = oci_identity_compartment.nikelinthecloud.id
  display_name   = "vcn_nitc"
}

output "vcn_id" {
  value = oci_core_vcn.vcnnitk.id
}
Import to note who we are referencing the compartment previously created in compartment.tf
oci_identity_compartment.nikelinthecloud.id where:
oci_identity_compartment Is the resource type
nikelinthecloud Is the name
id Is an attribute
Search on google “terraform oci_identity_compartment”
There you can see the Arguments we can use to create the compartment resource and the Attributes that we can use to reference this resource. For example the attribute id of oci_identity_compartment:
id – The OCID of the compartment.
If you didn’t run apply, do it. As ever , first run plan. Terraform will create the new VCN.
Check the infrastructure in the web console, if you don´t see the resources just created, try to sing out and sing in again.
We want that our compute instances in a public subnet can rearch internet, so, lests create an Internet Gateway and some rules to the default route table, IG_routes.tf.
resource "oci_core_internet_gateway" "internet_gateway" {
  compartment_id = oci_identity_compartment.nikelinthecloud.id
  display_name   = "IG"
  vcn_id         = oci_core_vcn.vcnnitk.id
}

resource "oci_core_default_route_table" "route_table" {
  manage_default_resource_id = oci_core_vcn.vcnnitk.default_route_table_id
  display_name               = "defaultRouteTable"

  route_rules {
    destination       = "0.0.0.0/0"
    destination_type  = "CIDR_BLOCK"
    network_entity_id = oci_core_internet_gateway.internet_gateway.id
  }
}
In the post that we are using as reference to create the infrastructure, we created two subnets, let’s create publicSubnet.tf.
resource "oci_core_subnet" "nitc_public" {
  cidr_block        = "10.20.2.0/24"
  display_name      = "nitc_public"
  dns_label         = "public"
  compartment_id    = oci_identity_compartment.nikelinthecloud.id
  vcn_id            = oci_core_vcn.vcnnitk.id
  security_list_ids = [oci_core_vcn.vcnnitk.default_security_list_id]
  dhcp_options_id   = oci_core_vcn.vcnnitk.default_dhcp_options_id
  prohibit_public_ip_on_vnic = false
  route_table_id    = oci_core_vcn.vcnnitk.default_route_table_id
}
Note that prohibit_public_ip_on_vnic is false, which means that this will be a public subnet.
Lest run plan and apply.
At this time we have created a compartment, VNC, an IG with a route table and a public subnet. Now lets create the private subnet, but before, we want to create a NAT Gateway and add a route rule in order to allow the compute instances in the private subnet, reach internet. nat_gateway.tf
resource "oci_core_nat_gateway" "nat_gateway" {
  compartment_id = oci_identity_compartment.nikelinthecloud.id
  vcn_id         = oci_core_vcn.vcnnitk.id
  display_name   = "nat_gateway"
}

resource "oci_core_route_table" "private" {
  compartment_id = oci_identity_compartment.nikelinthecloud.id
  vcn_id         = oci_core_vcn.vcnnitk.id
  display_name   = "private"

  route_rules {
    destination       = "0.0.0.0/0"
    destination_type  = "CIDR_BLOCK"
    network_entity_id = oci_core_nat_gateway.nat_gateway.id
  }
}
Then, the private subnet.
resource "oci_core_subnet" "nitc_private" {
  cidr_block        = "10.20.1.0/24"
  display_name      = "nitc_private"
  dns_label         = "private"
  compartment_id    = oci_identity_compartment.nikelinthecloud.id
  vcn_id            = oci_core_vcn.vcnnitk.id
  security_list_ids = [oci_core_vcn.vcnnitk.default_security_list_id]
  dhcp_options_id   = oci_core_vcn.vcnnitk.default_dhcp_options_id
  prohibit_public_ip_on_vnic = true
  route_table_id    = oci_core_route_table.private.id
}
This time, prohibit_public_ip_on_vnic is true
Run terraform plan then apply
We have completed our laboratory. Once you have tested the infrastructure, you can clean the compartment deleting the resources just created. (if you want relaunch the infrastructure, you can set enable_delete = true in compartment.tf, so the compartment wont be destroyed).
terraform destroy will show you: Plan: 0 to add, 0 to change, 5 to destroy.